What Is The Gooey Effect
The original method is here.
This is a method to create an effect that looks like objects are melting into each other using SVG filter.
It looks like marching cubes and raymarching, but it is processed in a post-processing manner using a completely different algorithm.
In this article, I would like to show you how to implement this effect using shaders.
I think it is more realistic in terms of performance to use shaders rather than SVG filters.
Here is an example of how I have used this method in the past for a project.
I made an interactive motion logo for Shibuya Tokyo, made with #webgl #threejs⁰It stands for "diversity & inclusion".It's my favorite work in this year, so I’m happy the credit is opened😊https://t.co/wSQ3hAzQeqモーションロゴ作りました。もちもち感気に入ってます✌️ pic.twitter.com/Z5u1OvrTD8
How The Gooey Effect Works
Apply Gaussian blur, increase contrast only for alpha and subtract a constant number. That's all.
However, the larger the blur value, the heavier it tends to be, so it must be implemented with care for performance.
After applying the Gaussian blur, multiply the colorMatrix as shown above in the original article on the gooey effect.
The 5-row matrix is not supported by either the shader or three.js, so I need to make this into a simultaneous equation myself.
Simply leave RGB as it is and calculate only A=18A−7.
It is a very simple algorithm, but there are a few things to keep in mind, so I will explain them while looking at the implementation.
Implementation
The implementation procedure is as follows
I will implement this using three.js.
(1) Render the scene to fbo_1.
(2) Apply Gaussian blur to fbo_1 in a vertically direction and write it to fbo_2. Apply Gaussian blur to fbo_3 in a horizontal direction and write it to fbo_3.
(3) Contrast only alpha of fbo_3 and subtract -> output to canvas.
1. Render A Scene
Render the scene with registered objects to fbo_1.
Be careful that the background must be transparent.
This is because this effect will not work unless everything except the object is transparent.
update(){
  renderer.setClearColor(0xffffff, 0.0)
  renderer.setRenderTarget(fbo_1);
  renderer.render(scene, camera);
  window.requestAnimationFrame(this.update.bind(this));
}
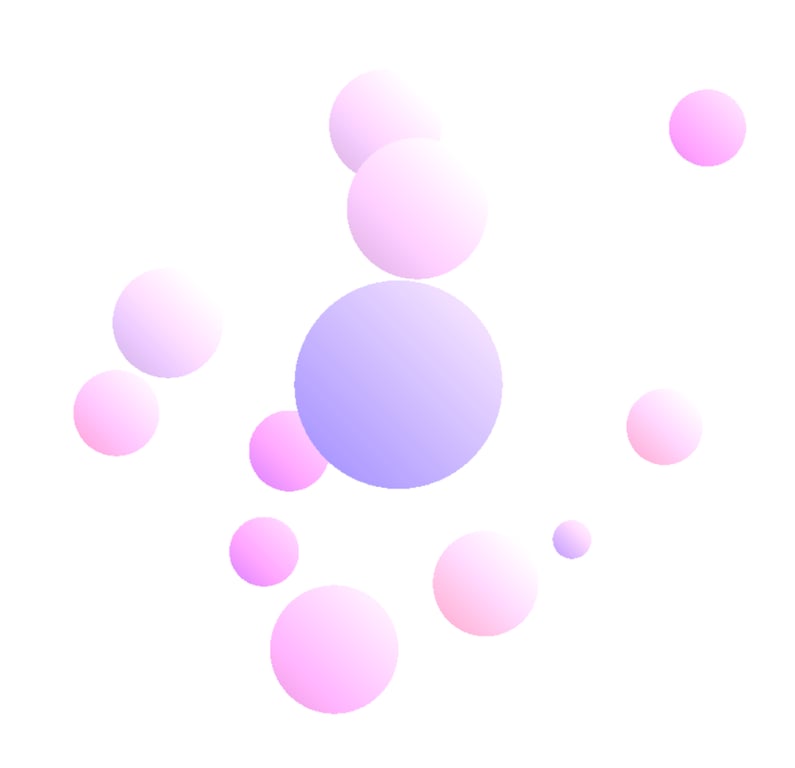
A lot of circles (CircleGeometry) and the color is brightened by uv.
2. Apply Gaussian blur
I will skip the explanation of Gaussian blur because it is not the main point.
Basically, rendering Gaussian blur twice, once vertically and once horizontally, is less expensive than rendering it once. I will use two fbo's (fbo_2 and fbo_3).
const weight = []
let t = 0.0;

for(let i = blurRadius - 1; i >= 0; i--){
  let r = 1.0 + 2.0 * i;
  let w = Math.exp(-0.5 * (r * r) / (blurRadius * blurRadius));
  weight.push(w);
  if(i > 0){w *= 2.0;}
  t += w;
}

for(let i = 0; i < weight.length; i++){
  weight[i] /= t;
}

const fbo_2 = new THREE.WebGLRenderTarget(width, height);
const fbo_3 = new THREE.WebGLRenderTarget(width, height);
const step = new THREE.Vector2(1 / width, 1 / height)

const planeGeometry = new THREE.PlaneGeometry(2, 2);
const defines = {
  BLUR_RADIUS: blurRadius
}

const commonUniforms = {
  uStep: {
    value: step
  },
  uWeight: {
    value: weight
  }
}

const vertical = new THREE.Mesh(
  planeGeometry,
  new THREE.ShaderMaterial({
    vertexShader,
    fragmentShader,
    uniforms: {
      uDiffuse: {
        value: fbo_1.texture
      },
      uStepSize: {
        value: new THREE.Vector2(1.0, 0.0)
      },
      ...commonUniforms
    },
    defines
  })
);

const horizontal = new THREE.Mesh(
  planeGeometry,
  new THREE.ShaderMaterial({
    vertexShader,
    fragmentShader,
    uniforms: {
      uDiffuse: {
        value: fbo_2.texture
      },
      uStepSize: {
        value: new THREE.Vector2(0.0, 1.0)
      },
      ...commonUniforms
    },
    defines
  })
);
update(){
  renderer.setClearColor(0xffffff, 0.0)
  renderer.setRenderTarget(fbo_1);
  renderer.render(scene, camera);

  renderer.setRenderTarget(fbo_2);
  renderer.render(vertical, camera);

  renderer.setRenderTarget(fbo_3);
  renderer.render(horizontal, camera);

  window.requestAnimationFrame(this.update.bind(this));

}
When doing Gaussian blur for the gooey effect, there is something to be careful of.
A pixel with a transparency of 0.0 is vec4(0.0), so when sampled, black color will be mixed around the outline.
Therefore, to prevent black from mixing with the final RGB, the RGB is divided by the total amount of blur that takes into account the alpha values of the surrounding pixels, which is like balancing the books.
blur.frag
uniform sampler2D uDiffuse;
uniform vec2 uStep;
uniform vec2 uStepSize;
uniform float uWeight[BLUR_RADIUS];

varying vec2 vUv;

void main() {
  float count =  float(BLUR_RADIUS) - 1.0;

  vec4 color = vec4(0.0);
  vec4 sum = vec4(0.0);
  float w;
  float sumW = 0.0;
  float actualWeight;

  for(int i = 0; i <  BLUR_RADIUS - 1; i++){
    w = uWeight[i];

    color = texture2D( uDiffuse, vUv - count * uStep * uStepSize);
    actualWeight = w * color.a;
    sum.rgb += color.rgb * actualWeight;
    sum.a += color.a * w;
    sumW += actualWeight;

    color = texture2D( uDiffuse, vUv + count * uStep * uStepSize);
    actualWeight = w * color.a;
    sum.rgb += color.rgb * actualWeight;
    sum.a += color.a * w;
    sumW += actualWeight;

    count--;
  }

  w = uWeight[BLUR_RADIUS - 1];

  color = texture2D( uDiffuse, vUv );
  actualWeight = w * color.a;
  sum.rgb += color.rgb * actualWeight;
  sum.a += color.a * w;
  sumW += actualWeight;

  gl_FragColor = vec4(sum.rgb / sumW, sum.a);
}

Now there is no muddy color at pixels with alpha > 0.0.
3. Apply Contrast To The Alpha And Subtract
Prepare a plane mesh for final processing and draw it in the canvas.
If transparent: true is not set for the output plane, it will behave strangely on some devices, so be sure to set it.
In this implementation, contrast is calculated at 80.0 and subtraction at 10.0.
const outputMesh = new THREE.Mesh(
  new THREE.PlaneGeometry(2, 2),
  new THREE.ShaderMaterial({
      vertexShader,
      fragmentShader,
      uniforms: {
          uDiffuse: {
              value: fbo_2.texture
          }
      },
      transparent: true
  })
);
update(){
  renderer.setClearColor(0xffffff, 0.0)
  renderer.setRenderTarget(fbo_1);
  renderer.render(scene, camera);

  renderer.setRenderTarget(fbo_2);
  renderer.render(vertical, camera);

  renderer.setRenderTarget(fbo_3);
  renderer.render(horizontal, camera);

  //output to canvas
  //set the background color here
  renderer.setClearColor(0xe0e7ff, 1.0)
  renderer.setRenderTarget(null);
  renderer.render(outputMesh, camera);

  window.requestAnimationFrame(this.update.bind(this));
}
output.frag
uniform sampler2D uDiffuse;
varying vec2 vUv;
void main(){
  vec4 diffuse = texture2D(uDiffuse, vUv);
  diffuse.a = min(1.0, diffuse.a * 80.0 - 10.0);
  gl_FragColor = diffuse;
}
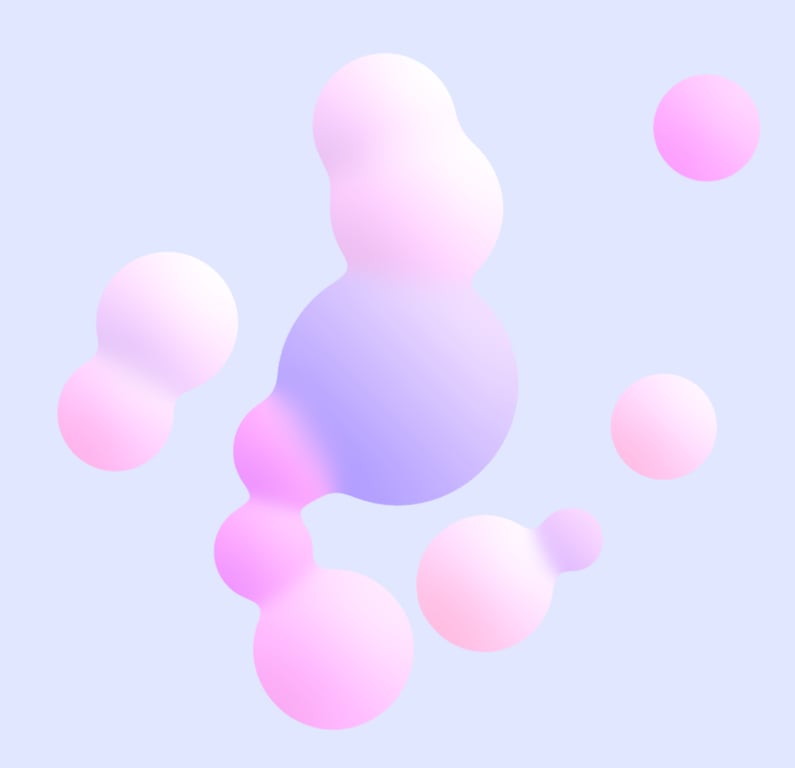
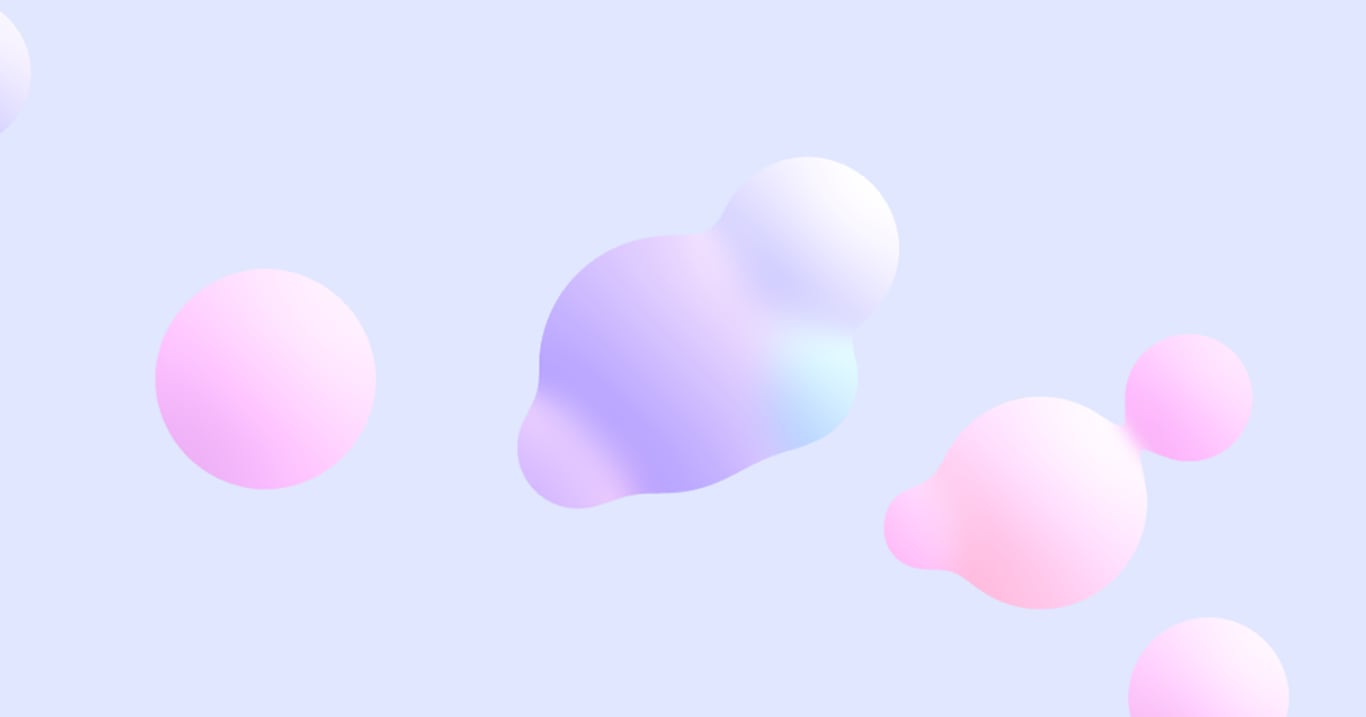
This is the result with background color.
The edges are now properly clean and the result is beautiful!
One point, this is only a 2D expression, so it is better to use marching cubes to express a meta-ball with depth in mind.
I think this is a limited effect, so it is better to use it with care in performance depending on the application.